
 AI Agent
First-time setup - enabling Cove AI
Enable the AI agent for your app, pick a starting mode, and understand how all the setup pieces fit together before you train and go live.
Setting up Cove AI takes about five minutes. This article walks you through the Setup tab, explains what the four modes mean, and points you to the other tabs you will configure next.
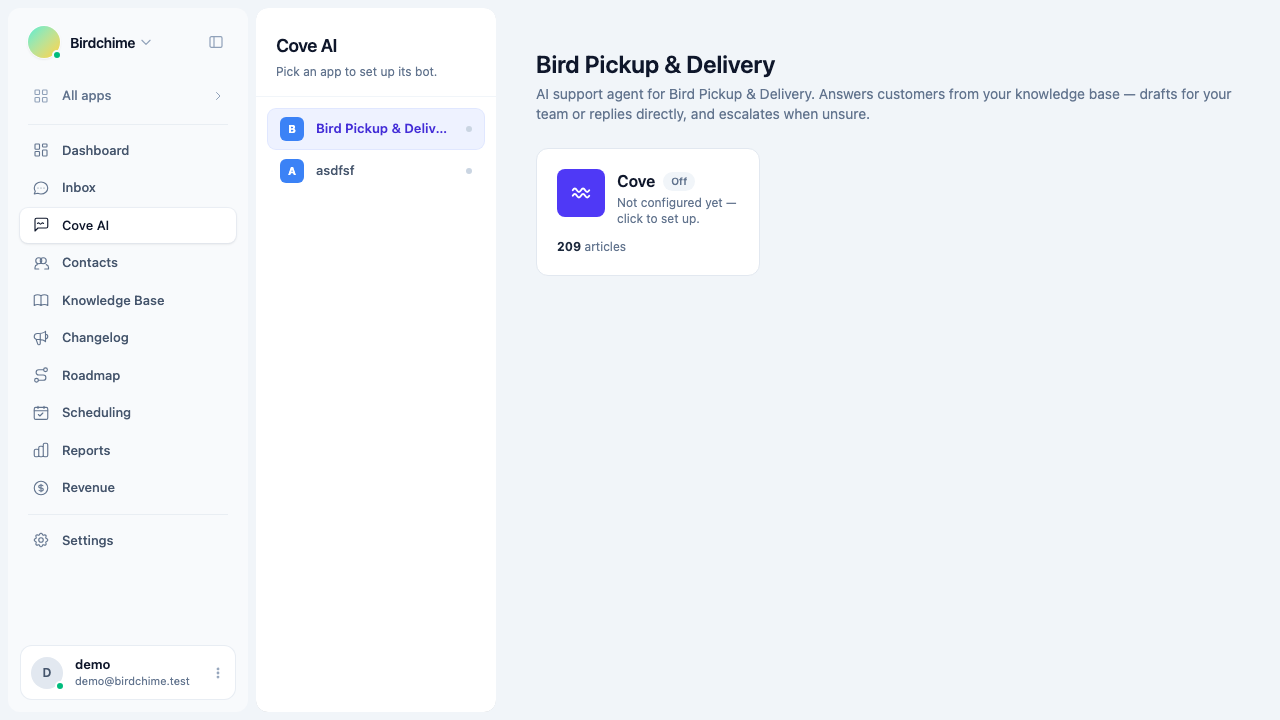
Go to Cove AI in the left navigation, then click on your app to open its settings. You land on the app overview card. Click anywhere on the card (or click Setup in the sidebar) to open the Setup section.
Step 1: Enable the agent
The first control in Setup is Enable AI agent - a toggle that is off by default. Flip it on.
Turning the toggle on activates the agent for new conversations. Existing open conversations are not affected. If you need to turn the agent back off, the same toggle disables it immediately.
While the toggle is off, all other settings are visible but dimmed. You can still configure them before you go live.
Step 2: Choose a mode
The Mode dropdown controls how the agent interacts with your customers. There are four options:
| Mode | What happens |
|---|---|
| Suggest | The bot drafts a reply for every message it has an answer to. An agent approves, edits, or rejects each draft before the customer sees it. |
| Auto when offline | The bot replies directly to customers only when your whole team is away. When any agent is online, it falls back to Suggest. |
| Auto | The bot always replies to customers directly whenever it is confident enough. |
| Hybrid | Suggest when at least one agent is online, Auto when the whole team is offline. |
Start with Suggest. The bot has never seen your customers’ questions before, and you have not yet built confidence in how it answers. Suggest mode keeps your team in control of every reply while you verify quality.
Once you have seen consistently good drafts and the analytics trust funnel shows an acceptance rate above 80%, you can graduate to Auto when offline or Auto. See Suggest mode vs auto-reply for the full graduation playbook.
Step 3: Save
Click Save (or changes are applied automatically as you leave the field, depending on your browser). A Saved badge appears briefly at the top right to confirm.
The new mode takes effect immediately for new conversations.
What to configure next
Setup is just the on switch. The bot will not be able to answer anything useful until you complete the rest of the tabs.
Training (required before the bot can answer)
The bot answers only from knowledge you provide. Open Training and:
- Click Train AI to embed your existing help articles.
- Optionally add web pages or upload files.
The bot is locked in the test console until at least one training run has completed. See Training your bot.
Persona (recommended)
Give the bot a name and a short description of your product and customers. This grounds every answer in your specific context. A bot named “Cove” with no persona context is weaker than one that knows it is helping merchants who use your Shopify delivery-date app. See Bot persona.
Behavior (optional, but high-value)
Control the AI model (Haiku vs Sonnet), tone of voice, whether the bot reads screenshots, and whether it can give plan-aware answers using each merchant’s Shopify subscription data. See Behavior settings.
Guardrails (set these before going live)
Set the confidence threshold (how sure the bot must be before answering) and list any topics that should always go to a human - billing disputes, account cancellations, legal questions. See The abstain gate.
Test console (before going live)
Ask the bot questions as if you were a customer. Verify it answers correctly and escalates when it should. The test console unlocks after your first training run. See Test console.
The full setup checklist
- Enable the agent and pick Suggest mode.
- Train the bot on your knowledge base.
- Fill in persona - display name and business context.
- Review guardrails - confidence threshold and topic fence.
- Test a handful of common questions in the test console.
- Go live.
Was this article helpful?
Thanks for your feedback!