
 Roadmap
Creating Roadmap Items
Add items to your roadmap from the admin panel, set a status, write a description, and control visibility.
Roadmap items are the cards on your public feature board. You can create them yourself, or they can come from customer submissions that you review and publish.
Where to find it
Go to Roadmap in the left nav. Items are shown in a board view grouped by status column, or in a list view. The count per status is shown at the top.
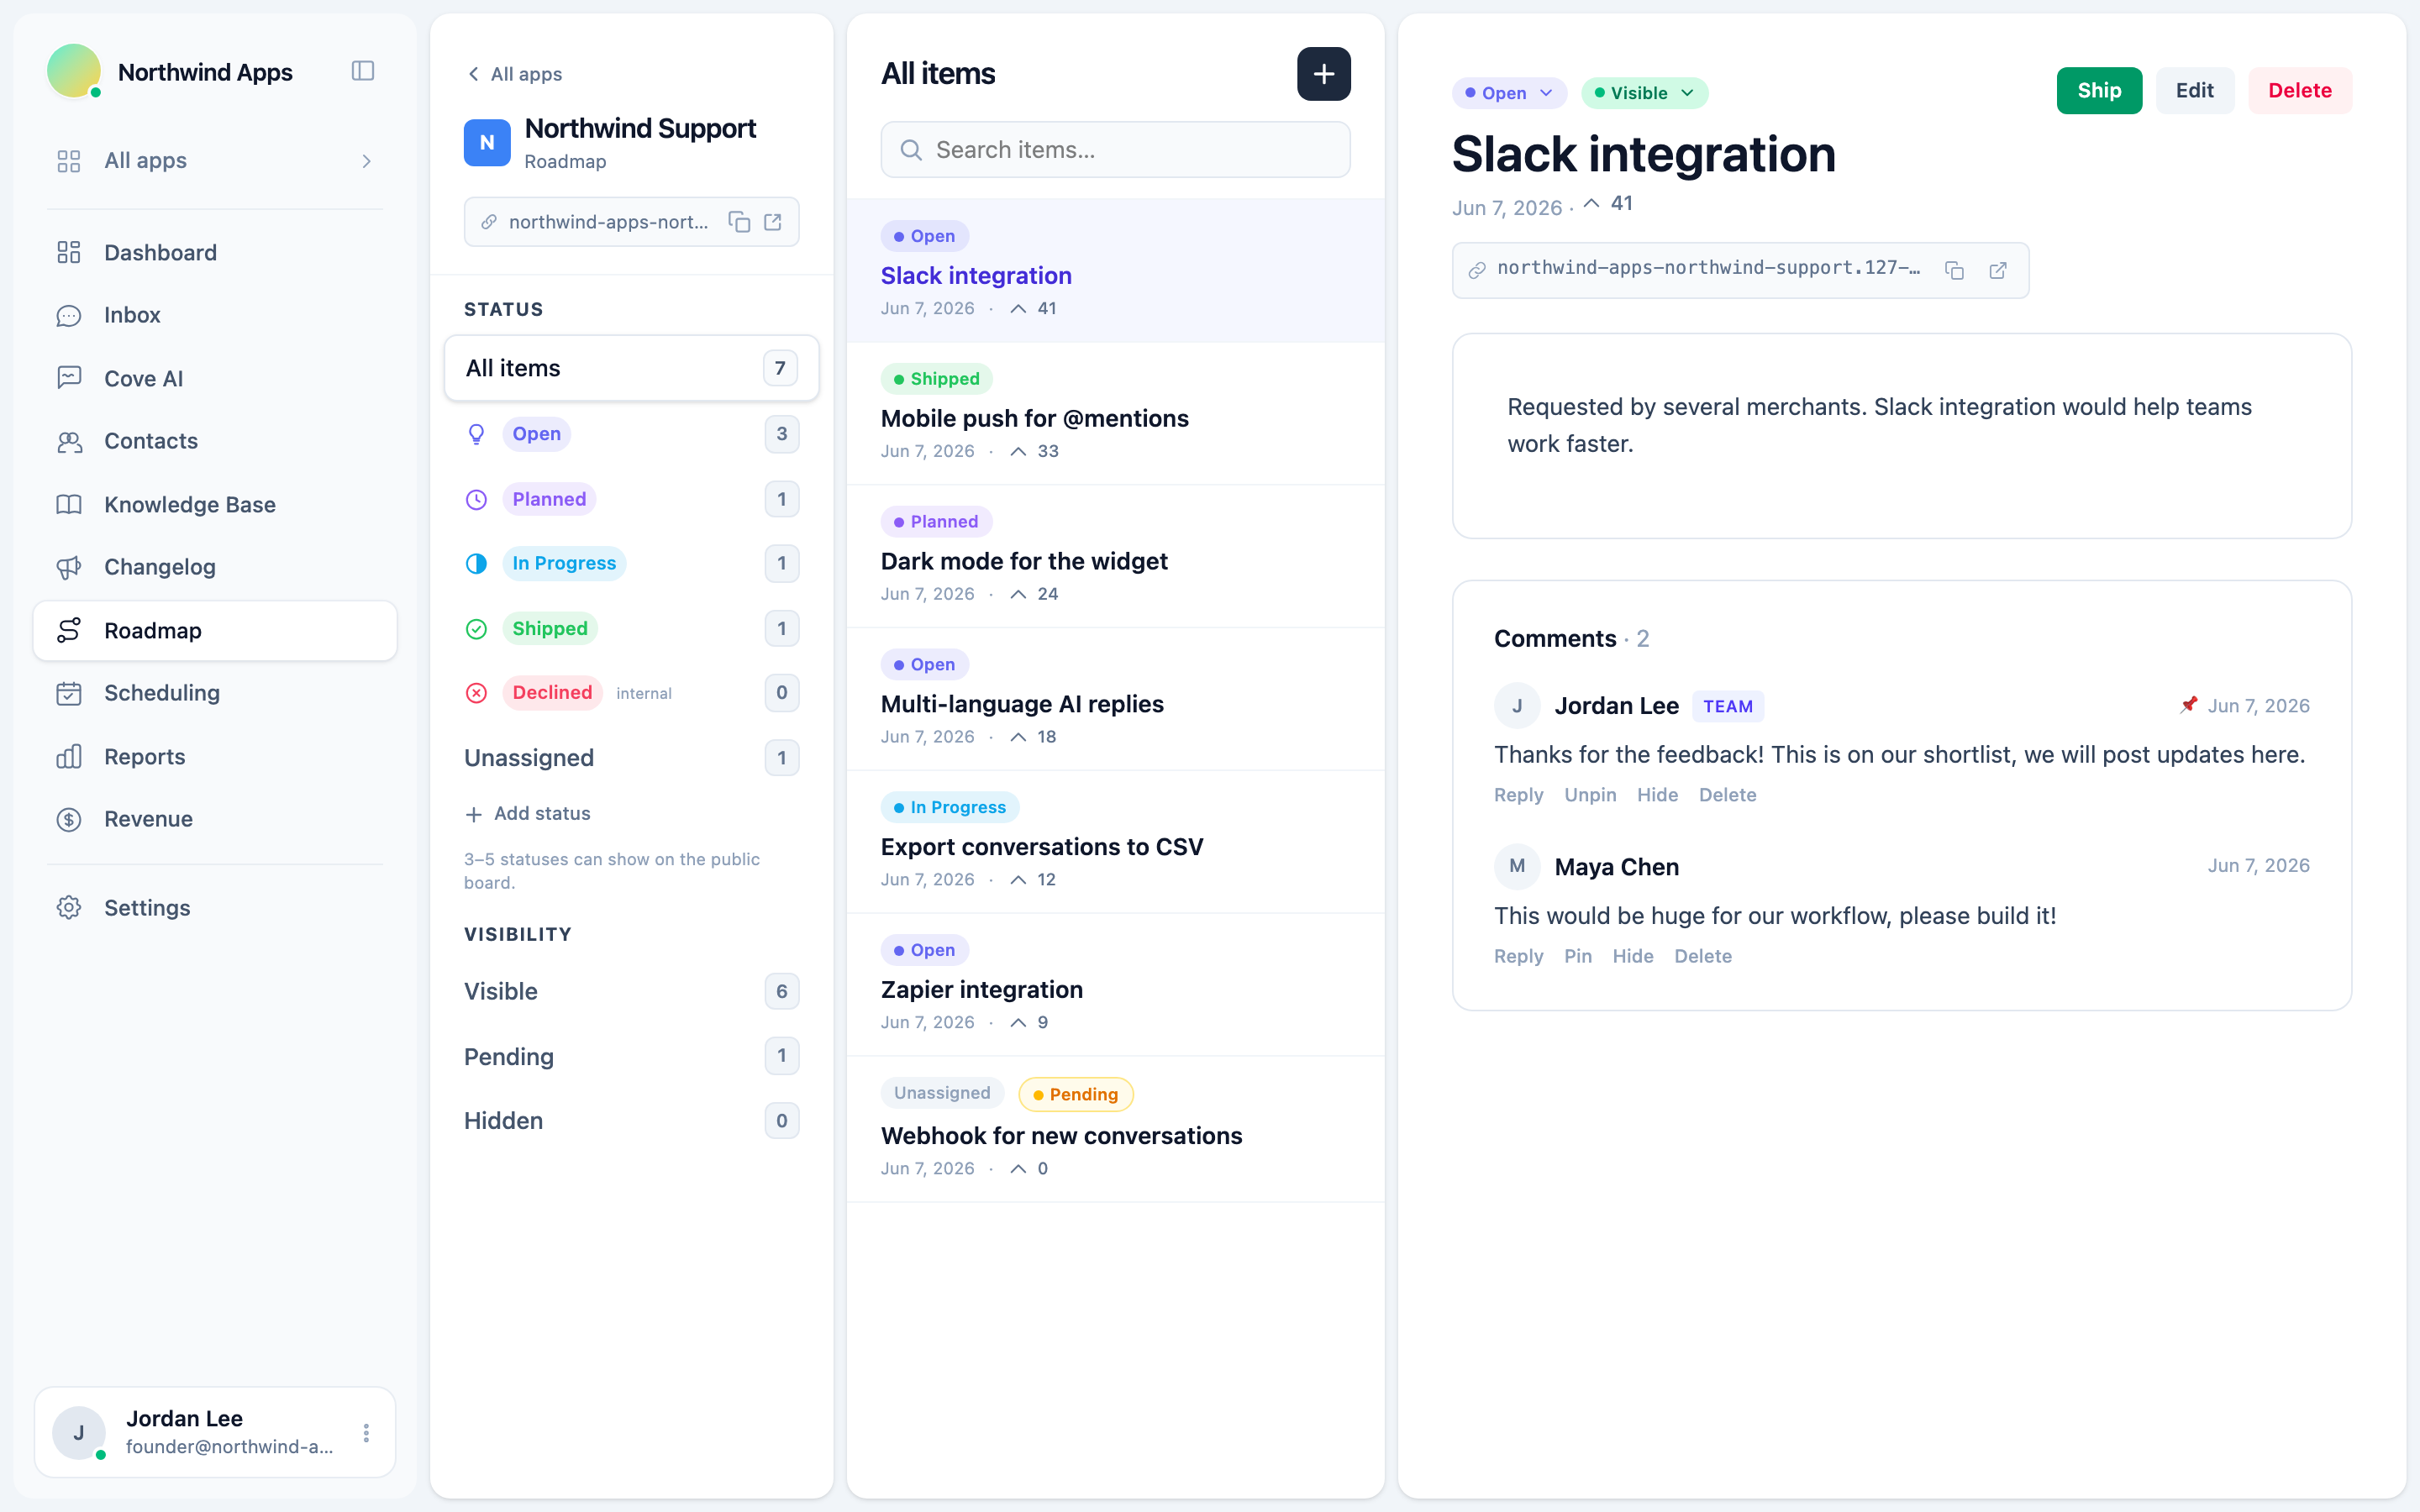
Creating an item
- Click New item in the top-right corner.
- Enter a title - keep it concrete (e.g. “Export contacts to CSV”).
- Write a description in the Markdown editor. Explain the feature and why it matters.
- Pick a status from the dropdown. This is one of your custom status columns (e.g. Open, Planned, In Progress). See Custom statuses.
- Set the visibility:
- Visible - shows on the public board.
- Pending - held for review; not shown to customers.
- Hidden - removed from the public board without deleting.
- Choose the language if your help center is multi-language.
- Click Save.
Linking a shipped item to a changelog entry
When a feature ships, you can link the roadmap item to the changelog entry that announced it. Open the item and pick the entry from the Shipped changelog entry field. This surfaces a connection between the two - useful for closing the loop with voters.
Editing and deleting
Click any card to open the editor. All fields are editable. To delete, open the item and use the delete option. Deleted items and their votes and comments are permanently removed.
The slug is auto-generated from the title and appears in the public URL: .../en/roadmap/your-item-title.
Next steps
- Custom statuses - define your own kanban columns.
- The public roadmap board - what customers see.
- Votes and comments - how engagement works.
Was this article helpful?
Thanks for your feedback!