
 Status Page
Posting an Incident and Updates
Report an incident to let users know something is wrong, then post timeline updates as you investigate and resolve it.
When something goes wrong, post an incident immediately. Users checking your status page will see it, understand what’s affected, and follow your updates as you work through it.
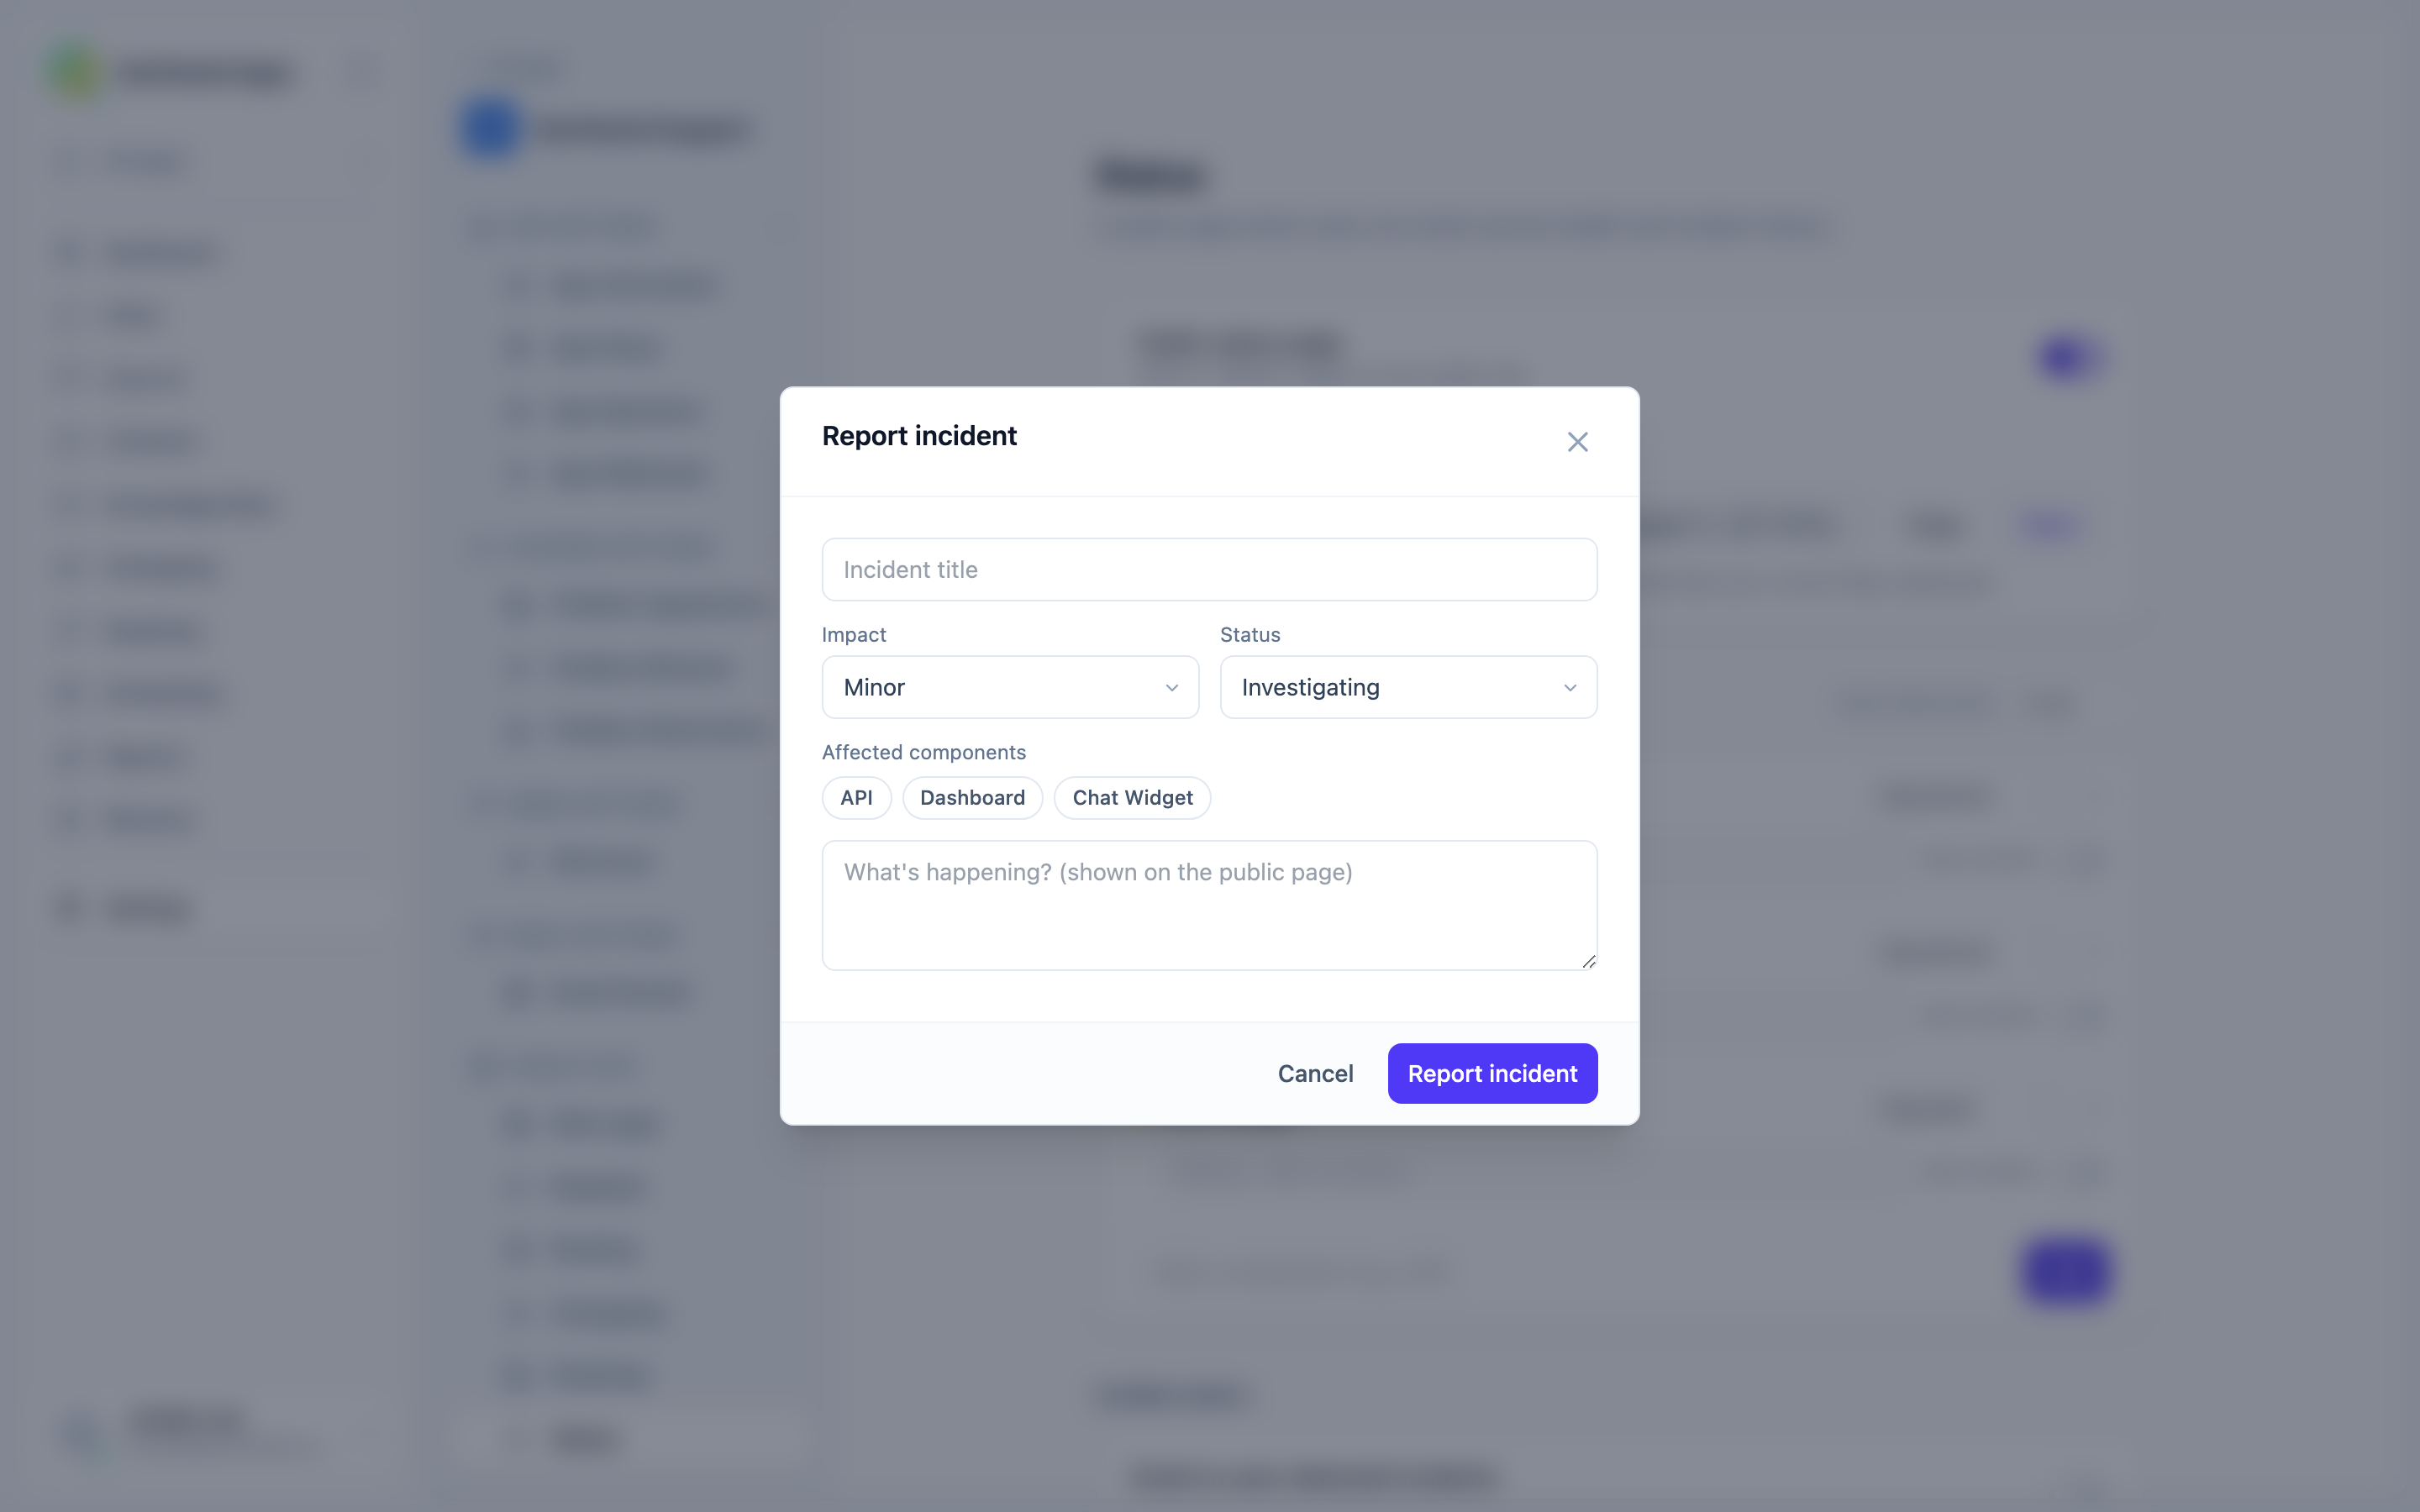
Reporting an incident
- Go to Settings → Apps → [your app] → Status.
- Click Report incident.
- Fill in the form:
- Title - a short summary of what’s happening (e.g. “API responding slowly”).
-
Impact - how bad it is:
- Minor - limited impact, most users unaffected.
- Major - significant portion of users affected.
- Critical - service broadly unavailable.
- Maintenance - planned downtime.
- Affected components - tick the components involved.
- Initial update - your first message to users: what you know so far, written as “Investigating: we are looking into reports of slow API responses.”
- Submit. The incident appears on your public status page immediately.
The incident status lifecycle
Incidents move through four statuses as you learn more:
| Status | Use it when |
|---|---|
| Investigating | You know something is wrong but don’t know the cause yet. |
| Identified | You’ve found the root cause and are working on a fix. |
| Monitoring | The fix is deployed; you’re watching to confirm everything is stable. |
| Resolved | The incident is over. All systems are back to normal. |
Each status update you post carries the current status. The last update on a resolved incident is the final message - write it as a brief explanation of what happened and confirm normal operation.
Posting updates
As the incident progresses, post updates to keep users informed:
- Open the active incident in the admin.
- Click Post update.
- Write the update message (e.g. “Identified: the issue was traced to a database connection pool exhaustion. We are rolling out a fix now.”).
- Pick the new incident status from the dropdown.
- Post. It appears at the top of the incident timeline on the public page.
Each update is timestamped. Users see the full history in chronological order.
Post at least one update every 30-60 minutes during a live incident, even if it’s just “Still investigating - no new information yet.” Silence during an outage is frustrating for users.
Resolving an incident
When the issue is fixed:
- Post a final update with status Resolved.
- Describe what happened and confirm normal operation.
- The incident moves from “Active incidents” to “Past incidents” on the public page.
Optionally, also update any affected components back to Operational if they were changed during the incident.
Deleting an incident
To remove an incident entirely (e.g. a false alarm), open it in the admin and use the delete option. This removes it and all its updates from the public page.
Next steps
Was this article helpful?
Thanks for your feedback!